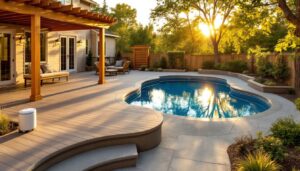
An above ground pool doesn’t have to look like a temporary summer fixture tucked in a corner. With thoughtful planning and some practical upgrades, you can transform the area around your pool into a functional, inviting outdoor living space that your family actually uses. Whether you’re working with a tight budget or ready to invest in premium materials, creating a cohesive patio environment, complete with decking, seating, landscaping, and lighting, turns poolside lounging from basic to genuinely enjoyable. The good news: most of these ideas work within DIY skill levels and don’t require professional installation. Let’s walk through concrete solutions that deliver real results.
Table of Contents
ToggleKey Takeaways
- Composite decking and concrete are the best materials for above ground pool patios because they resist chlorine splashes and moisture degradation better than wood.
- Create defined zones with separate lounging and dining areas using furniture, borders, or different materials to make your above ground pool patio feel intentional and functional.
- Plant chlorine-tolerant species like boxwood, juniper, and ornamental grasses 2-3 feet away from the pool wall to avoid damage and add privacy without excessive maintenance.
- Layer two types of lighting—task lights for safety (every 4-6 feet) and ambient lights like string lights for mood—to transform your patio into an inviting evening gathering space.
- Budget-friendly upgrades like concrete staining, pallet furniture, and mulch refresh can dramatically improve your patio’s appearance for under $300 without professional installation.
- Slope your decking 1/8 inch per foot away from the pool to prevent standing water, and maintain clear access paths to your pool’s pump and filter for easier cleaning.
Decking Solutions That Complement Your Pool
Composite vs. Wood vs. Concrete: Which Decking Works Best
Your decking choice sets the tone for the entire patio. The three main contenders each have different maintenance demands, longevity, and cost profiles.
Wood decking (typically pressure-treated lumber or cedar) costs less upfront, usually $8–$15 per square foot installed, and feels warm underfoot. The downside: you’ll need to stain or seal it every 2–3 years, and it splinters over time. Rot and insect damage are real concerns in damp climates. If you go this route, use 5/4-inch boards (actual thickness: roughly 1 inch) for better durability than standard 1-inch decking.
Composite decking (wood-plastic blend) runs $15–$30 per square foot but requires almost no maintenance. It won’t rot or splinter, and it resists fading better than wood. The trade-off: it can get hot underfoot on sunny days, and some cheaper composites stain easily. Premium brands like Trex or TimberTech perform better but cost more.
Concrete is the budget champion at $6–$12 per square foot and lasts decades with minimal care. You can finish it with stain, overlay, or stamping to mimic other materials. Downside: it cracks under freeze-thaw cycles, and barefoot comfort depends on the finish texture. A broom finish prevents slipping and feels less harsh than a smooth pour.
For pool patios specifically, concrete or composite wins because they handle constant moisture and chlorine splashes without degradation. Wood requires vigilance in that environment. Whatever you choose, slope your decking slightly (1/8 inch per foot) away from the pool to prevent standing water.
Creating Functional Lounge and Seating Areas
An above ground pool patio needs defined zones. Create one lounging area with weather-resistant chairs or a daybed, and a separate dining or socializing spot a few feet away. This separation makes the space feel intentional rather than cramped.
Lounge furniture designed for wet environments matters. Look for powder-coated aluminum or stainless steel frames paired with quick-dry fabrics (acrylic or solution-dyed polyester). Avoid standard upholstered couches unless you’re willing to bring them indoors after every use. A single chaise lounge or pair of recliners positioned with a small side table works well for poolside napping.
For seating, consider a bistro-style dining set, compact, stackable, and easy to move. This footprint (usually 36–42 inches) fits most patio sizes without consuming space. If you have room and budget, add a pergola or shade sail overhead. This transforms a basic seating area into somewhere people actually want to sit during peak sun hours.
Built-in seating is another DIY option. Construct a bench frame from 2×6 and 2×4 lumber, then install removable cushions. This saves money compared to furniture and anchors the space visually. Make sure your bench height is 17–18 inches (standard seating height) and sits far enough from the pool edge that water spray doesn’t soak it constantly.
Use concrete pavers or decking to define these zones. A simple border or different material creates visual separation without walls. Above ground pool cleaning and maintenance become easier when furniture isn’t scattered everywhere, so plan your layout to leave clear access paths to your pool’s pump, filter, and walls.
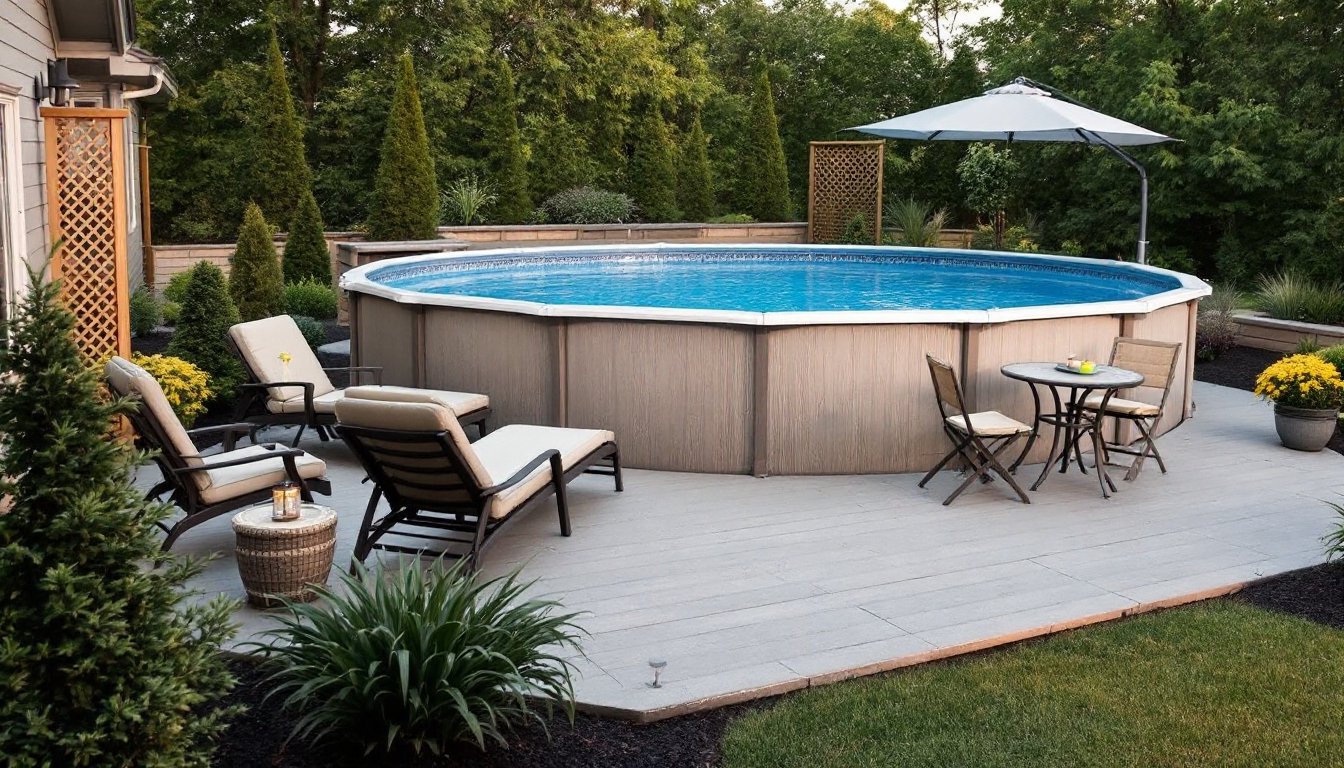
Landscaping and Greenery Around Your Pool Space
Smart plant choices soften the hard edges of an above ground pool and add privacy without breaking the budget. The catch: chlorine splashes, salt creep (if you use a saltwater system), and foot traffic demand tough plants.
Avoid plants directly against the pool wall. Chlorine splash kills foliage and creates a brown, dead-looking border. Set plantings back at least 2–3 feet. Hardy, salt- and chlorine-tolerant species include boxwood, juniper, dwarf spruces, and ornamental grasses like fountain grass or switchgrass. These provide greenery, texture, and some visual privacy without fussiness.
For a quick privacy screen, bamboo fencing or lattice panels work well. Attach them to posts set 3–4 feet from the pool edge, then plant fast-growing vines (clematis, honeysuckle) along the base. Avoid trees directly overhead, falling leaves create endless cleanup and are a drowning hazard risk.
Ground-level plantings matter too. A border of mulch or decomposed granite around the pool’s footprint looks intentional and prevents dirt from splashing onto decking. Use landscape fabric underneath to suppress weeds, then top with 2–3 inches of mulch. This simple step costs under $100 and transforms the visual appeal immediately.
Consider raised planter beds (built from composite or untreated lumber) for seasonal flowers or herbs. Herbs like rosemary and lavender tolerate splashing better than tender annuals. Arrange planters in clusters of three or five for better visual impact than scattered singles. Container gardening also lets you refresh the look each season without committing to permanent plantings.
Lighting and Ambiance for Evening Pool Time
Proper lighting transforms your patio from unusable at dusk to genuinely inviting in the evening. You need two types: task lighting (for safety and function) and ambient lighting (for mood).
Task lighting keeps people safe. Install LED deck lights (recessed into decking or mounted on posts) at regular intervals, typically every 4–6 feet along walkways. These should be bright enough to see clearly but not so intense they create glare on the water. LED strip lights mounted under railings or along bench edges provide soft, directional light without harsh shadows. Aim for 3000K color temperature (warm white) for a relaxing feel rather than the clinical 5000K brightness.
Ambient lighting sets the mood. Solar-powered stake lights around landscaping beds cost $15–$30 for a set of eight and require zero wiring. String lights (Edison bulbs or cafe lights) stretched overhead between posts or a pergola create an outdoor-living-room vibe. For durability, choose weatherproof, LED Edison bulbs, they last 25,000+ hours and use a fraction of the energy of incandescent versions.
If you’re comfortable with basic wiring, low-voltage landscape lighting (12 volts) is safer and easier than standard 120-volt circuits. A kit with a transformer, wire, and spike lights runs $40–$80 and plugs into an outdoor outlet. Bury the wire in a shallow trench along your patio edge, then position lights where they highlight plantings or accent the pool perimeter.
In-pool lighting (some above ground pools have built-in options) adds drama. If your pool doesn’t have lighting, floating LED pond lights are affordable alternatives. Safety note: always use GFCI-protected circuits for any outdoor electrical work, and hire a licensed electrician if you’re unsure about wiring.
DIY Budget-Friendly Patio Upgrades
Not every upgrade requires a contractor or deep pockets. These ideas deliver noticeable results without very costly.
Concrete sealing and staining ($200–$400 DIY for a typical patio) instantly refreshes plain concrete. Use a concrete stain (available at any home improvement retailer) to add color, earth tones, grays, and warm beiges hide dirt better than white. Follow product instructions carefully: prep the surface with a concrete degreaser and pressure washer, then apply stain in thin, even coats. Seal it afterward for durability. This single weekend project changes the entire vibe.
Pallet furniture is a classic budget move. Reclaimed wooden pallets (sometimes free from retailers) can become loungers, side tables, or sectional bases. Sand them smooth, treat with deck stain or exterior paint, and add weatherproof cushions. A pallet lounge costs $30–$80 in materials versus $300+ for new furniture. Just ensure pallets are heat-treated (stamped with “HT”), not chemically treated, before repurposing.
Shade solutions on a budget: A DIY shade sail using outdoor fabric and cable kits ($100–$200) blocks sun without the cost of a permanent pergola. Mount corner brackets to your pool’s frame or nearby posts, then tension the fabric. It’s removable, replaceable, and surprisingly durable.
Mulch refresh costs $50–$150 depending on patio size, but it’s transformative. Fresh, dark mulch makes plantings pop and frames the pool edge professionally. Apply 2–3 inches and top up each spring.
Paint or stain your pool wall (exterior side). Many above ground pools are drab gray or tan. High-quality exterior paint rated for pool environments (ask your supplier) in a soft blue, teal, or charcoal dramatically improves the backdrop. This is a weekend job with a roller and brush, no special skills needed. One coat costs $30–$60 in materials and changes the entire aesthetic. Keep the above ground pool cleaning service schedule during off weeks so you don’t chase paint maintenance with constant chemical-brush interactions.
Conclusion
Building a functional, attractive above ground pool patio doesn’t demand luxury budgets or professional crews. Start with the fundamentals, solid decking, defined seating zones, hardy plantings, and thoughtful lighting, then layer in personal touches. Most of these projects (decking, staining, furniture arrangement, basic landscaping, and lighting) are well within reach for DIY homeowners. Prioritize prep work and material quality over quantity. A smaller patio done right beats an expansive space that feels incomplete. With these seven approaches, your backyard transforms into a genuine outdoor oasis your family will use all summer long.