A covered pool patio transforms your backyard into a year-round outdoor living space, protecting swimmers from harsh sun, reducing chemical evaporation, and keeping debris out of the water. Whether you’re looking to extend your swimming season or create a shaded entertaining area, a covered pool patio adds genuine value and functionality to your home. This guide walks you through the design options, key benefits, material choices, and practical planning steps to bring your pool cover structure to life without guesswork or costly mistakes.
Table of Contents
ToggleKey Takeaways
- A covered pool patio reduces chlorine breakdown by protecting water from UV rays, cutting chemical costs by up to 80–90% and reducing evaporation by up to 95%.
- Common covered pool patio styles include pergolas for partial shade, solid canopies for complete UV protection, retractable awnings for flexibility, and hybrid designs combining aesthetics with function.
- Polycarbonate, corrugated metal, composite, wood, and aluminum are the primary materials, each with different lifespans (10–25 years) and costs ranging from $3,000–$15,000+ for a 300 sq. ft. installation.
- Building permits are mandatory for covered patios and typically cost $100–$300; structural calculations must be engineer-approved, and footings must be set below the frost line to meet building codes.
- Plan for 3–4 months from design to completion, hire licensed professionals for frame and roofing installation, and get multiple contractor quotes to ensure proper drainage and long-term durability.
- A well-built covered pool patio increases property value, extends the swimming season by providing comfortable shade, reduces debris and maintenance, and protects deck materials from UV degradation.
What Is a Covered Pool Patio and Why Homeowners Love Them
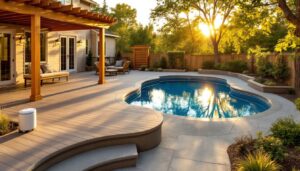
A covered pool patio is a permanent or semi-permanent structure, typically a roof, canopy, or pergola frame, installed over or adjacent to your pool deck. It shelters swimmers and sunbathers while allowing sight lines and airflow, unlike a full pool enclosure. The structure sits on footings anchored into the ground, with the roof supported by posts or columns.
Homeowners appreciate covered patios because they solve real problems. Sun exposure causes chlorine to break down faster, meaning you use more chemicals and spend more on maintenance. A solid or translucent roof cuts UV rays by 80–90%, reducing evaporation and chemical waste. Debris, leaves, pollen, insects, falls into an uncovered pool constantly: a roof eliminates that frustration. On hot days, a shaded patio makes the deck comfortable to walk barefoot and gives swimmers a place to cool off without leaving the pool area.
Beyond functionality, covered patios extend your pool season. In spring and fall, swimmers can enjoy the water longer when they’re not baking in direct sun. Evening entertaining becomes more pleasant when guests aren’t fighting glare or squinting. The structure also defines your outdoor space, creating a dedicated zone that feels intentional rather than just a pool in the yard.
Key Benefits of Adding a Pool Cover Structure
A covered pool patio delivers multiple benefits beyond aesthetics:
Reduced Chemical Consumption: Sunlight breaks down chlorine at a rate of 10–30% per day in an uncovered pool. A cover, even a translucent one, protects the water and cuts replacement chemical costs significantly over a season.
Lower Water Evaporation: Heat and UV rays drive evaporation. A roof reduces evaporation by up to 95%, meaning you refill your pool less often and waste less water. In drought-prone regions, this matters.
Extended Season Comfort: Shade makes the pool area usable during peak heat hours when an open pool becomes too sunny to enjoy. Evening entertaining is more pleasant without harsh glare.
Debris Reduction: Fewer leaves, pollen, and insects in the water means less frequent skimming, backwashing, and filter cleaning. Your pool stays clearer longer between chemical treatments.
Property Value: A well-built covered patio is a tangible upgrade. Appraisers recognize it as an improvement that increases livability and outdoor appeal, especially in climates with intense sun or unpredictable weather.
Structural Longevity: UV exposure degrades pool deck materials, railings, and furniture. Shade extends the lifespan of decking and equipment, reducing replacement costs.
Design Styles and Materials for Pool Patios
Your covered patio structure should complement your home’s architecture and suit your climate. A modern home might pair with a flat-roof aluminum canopy, while a Mediterranean-style house could feature a wooden pergola with lattice details. Versatility matters: some designs filter light while remaining open to airflow: others are fully enclosed to protect against rain and wind.
Common structural styles include:
Pergolas: Open-beam structures (typically wood or metal) with parallel slats or lattice. They provide partial shade, about 30–50% coverage depending on spacing, and keep the deck feeling airy. Pergolas are less expensive upfront but offer less sun and rain protection.
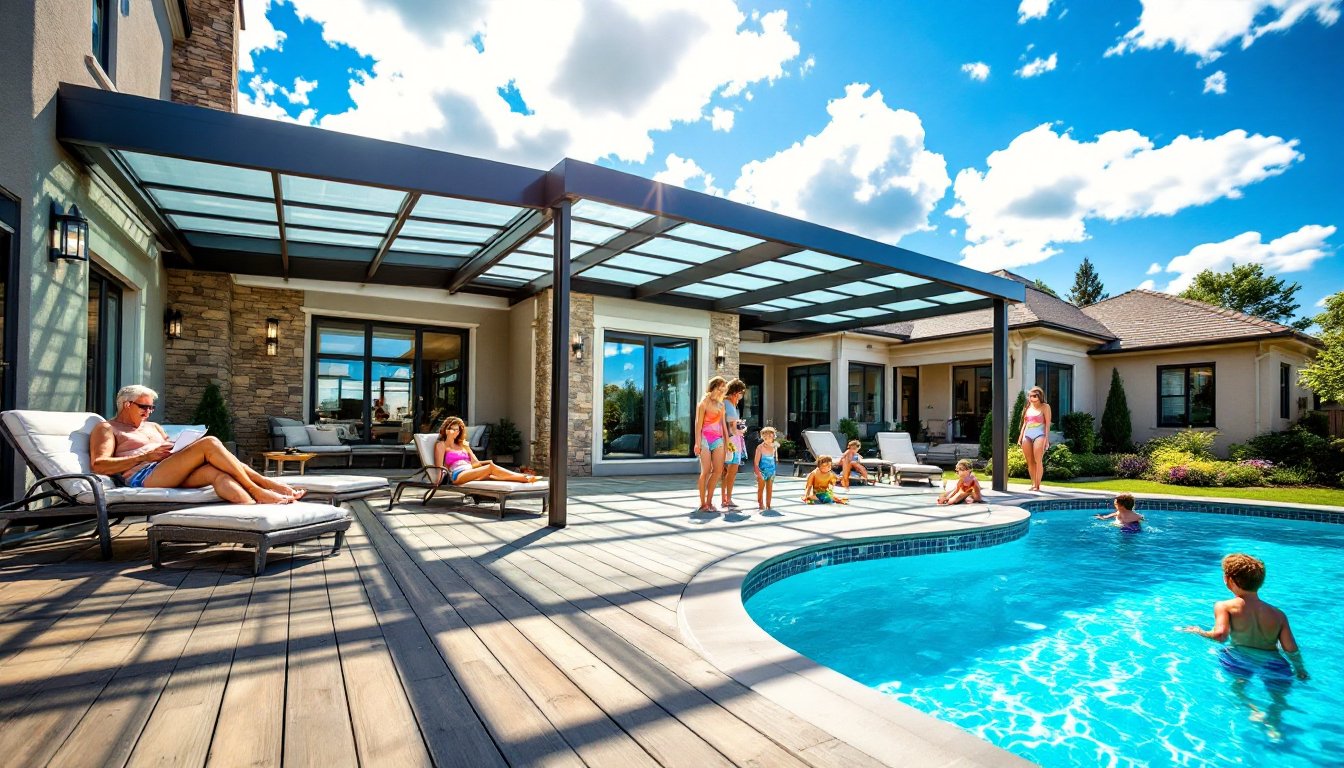
Solid Canopies: Metal-frame structures with solid roofing panels (polycarbonate, corrugated metal, or composite). They block 80–100% of UV rays and provide complete rain protection. Canopies are more durable and require less maintenance than wood but may feel more industrial depending on finish.
Retractable Awnings: Motorized fabric systems that extend or retract based on weather and preference. Ideal for homeowners who want flexibility, though they’re more expensive and require electrical and mechanical maintenance. Canvas or acrylic fabrics resist UV and water damage.
Hybrid Designs: Combinations, say, a wood frame with polycarbonate panels, or a pergola with a detachable shade cloth, give you the best of both worlds: aesthetics and function.
Popular Cover Materials and Durability
Polycarbonate Panels: Lightweight, clear or translucent, and block UV radiation. Panels typically come in sheets 4’×8′ and are attached to the frame with aluminum extrusions. They’re durable (10–15 year lifespan) and allow light penetration while cutting glare. Cost runs $6–12 per square foot for materials.
Corrugated Metal (Standing Seam or Ribbed): Durable, weather-resistant, and clean-lined. Usually aluminum or galvanized steel. Excellent for modern or contemporary homes. Expect a 20–25 year lifespan. More expensive than polycarbonate but tougher.
Composite or PVC Panels: Engineered materials that resist UV and moisture without the brittleness of older plastic. Some offer a wood-look finish. Typically last 15–20 years. Cost is midrange.
Pressure-Treated Wood: Traditional and attractive but requires regular staining or sealing. Joists and posts bear the structural load: decking or lattice may be overlay. Lifespan is 10–15 years with maintenance. Budget $8–15 per square foot for framing material.
Aluminum Frames: Lightweight, rust-resistant, and low-maintenance. Often paired with polycarbonate or metal roofing. Frames alone cost $4–8 per square foot: add roofing material on top.
Material choice depends on climate (high UV or heavy snow load?), budget, and maintenance tolerance. Hot, sunny climates benefit from UV-blocking polycarbonate. Areas with heavy wind or snow need stronger metal or engineered composite materials. Humid or wet climates favor corrosion-resistant aluminum or stainless fasteners to prevent rust and decay. Builders and designers often reference resources like HGTV for design inspiration and material comparisons when planning similar projects.
Planning Your Covered Pool Patio Project
Before breaking ground, you need a clear plan. Start by defining the covered area, does it roof the entire deck, or just a portion? Most homeowners cover the deck adjacent to the pool, leaving open water for sunbathing. Typical patio covers range from 250 to 500 square feet, though yours may be smaller or larger.
Measure and Document: Take accurate measurements of the pool and deck. Note the pool’s length, width, and any irregular shapes. Measure the deck depth from the pool edge to where you want the cover to end. Document surrounding obstacles: the house wall, landscaping, utility lines, fences, and trees. This sketch becomes essential for contractor quotes and permit applications.
Load and Structural Requirements: The roof must support its own weight (typically 5–15 pounds per square foot depending on material) plus snow load (critical in winter climates), wind load (varies by location), and the weight of someone standing on it for maintenance. Posts and footings must be sized accordingly. This is not guesswork, it’s determined by local building codes and your region’s wind and snow loads.
Electrical and Ventilation: If you’re adding overhead fans, lighting, or heating elements, plan the electrical run now. Ensure your cover doesn’t trap heat or moisture: adequate airflow prevents mold and keeps the area comfortable. If water collects on the roof, plan drainage, either pitched panels with gutters or built-in slope toward drains.
Views and Sight Lines: A solid roof can feel cramped if positioned poorly. Consider sight lines from your house and deck. Many homeowners prefer a design that doesn’t completely block the sky, a pergola or partial-coverage canopy can work better psychologically. Also think about neighbors’ views and any privacy concerns.
Budget, Permits, and Timeline Considerations
Cost Expectations: A simple pergola (wood frame, open slats) runs $3,000–8,000 for a 300 sq. ft. space. A solid canopy with polycarbonate or metal roofing costs $6,000–15,000 for the same area. Retractable awnings start around $5,000 but can exceed $20,000 for large spans. Labor is typically 40–60% of the total cost. These figures vary significantly by region, material grade, and complexity. Get at least three quotes, your local pool contractor may partner with cover suppliers, or search for certified aluminum canopy installers.
Permits and Building Codes: A covered patio is usually considered a structure and requires a building permit in most jurisdictions. This isn’t optional, unpermitted work can create liability and title issues when selling. The permit process typically involves a site plan, structural calculations (engineered by a licensed professional), and inspection of footings and framing. Permits cost $100–300 depending on your area. The inspector verifies that posts are set on footings below the frost line (12–36 inches depending on your climate), that all connections meet the National Building Code, and that electrical work (if any) complies with the NEC. Turn-around for permit approval is usually 2–4 weeks.
Timeline: Expect the permitting process to add 4–6 weeks before work begins. The actual installation (assuming standard size and straightforward conditions) takes 5–10 business days, weather permitting. Concrete footings need 7 days to cure before the frame is loaded. Plan 3–4 months from concept to completion if you include design, permitting, and installation. Rushing any step increases risk of errors or inferior work.
Professional vs. DIY: Framing a simple pergola (post and beam) is achievable for experienced DIYers comfortable with concrete work, layout, and fastening. Attaching roof panels and ensuring proper drainage and flashing requires precision. Structural sizing and load calculations, non-negotiable for building code compliance, must come from a licensed professional or use an approved engineered design. Unless you’ve built structures before, hire professionals for the frame and roofing installation. The cost difference is modest compared to rebuilding after a mistake or fixing a roof leak years later. Proper setup at the start saves headaches and expense later.
When selecting a contractor, verify their licensing, insurance, and references. Ask if they’ve worked with your local building department and if they include a warranty on materials and labor. A reputable builder with pool knowledge understands not just the cover structure but how to position it for drainage and minimize impact on pool chemistry and maintenance.
Conclusion
A covered pool patio is a smart, long-term investment that makes your pool more enjoyable, reduces maintenance costs, and extends your entertaining season. The key is choosing a design and material that fit your climate, budget, and lifestyle, then committing to proper permitting and professional installation. Start with accurate measurements, get multiple quotes, and don’t skip the permit process. When you’ve got the structure right from day one, you’ll spend less time troubleshooting and more time enjoying your pool.