As temperatures drop and heating season approaches, your HVAC system is about to earn its keep. Fall is the ideal time to address maintenance tasks that prevent winter breakdowns, improve efficiency, and keep energy bills in check. Most homeowners neglect their systems until something breaks, then they’re stuck calling an emergency service on a frigid night. A little prep work now takes just a few hours but pays dividends in comfort and reliability. This fall HVAC maintenance checklist walks you through seven essential tasks you can tackle yourself or hand off to a pro, depending on your comfort level and the job’s complexity.
Table of Contents
ToggleKey Takeaways
- A fall HVAC maintenance checklist prevents winter breakdowns and can reduce heating costs by 10–25% through filter replacement, duct sealing, and efficiency improvements.
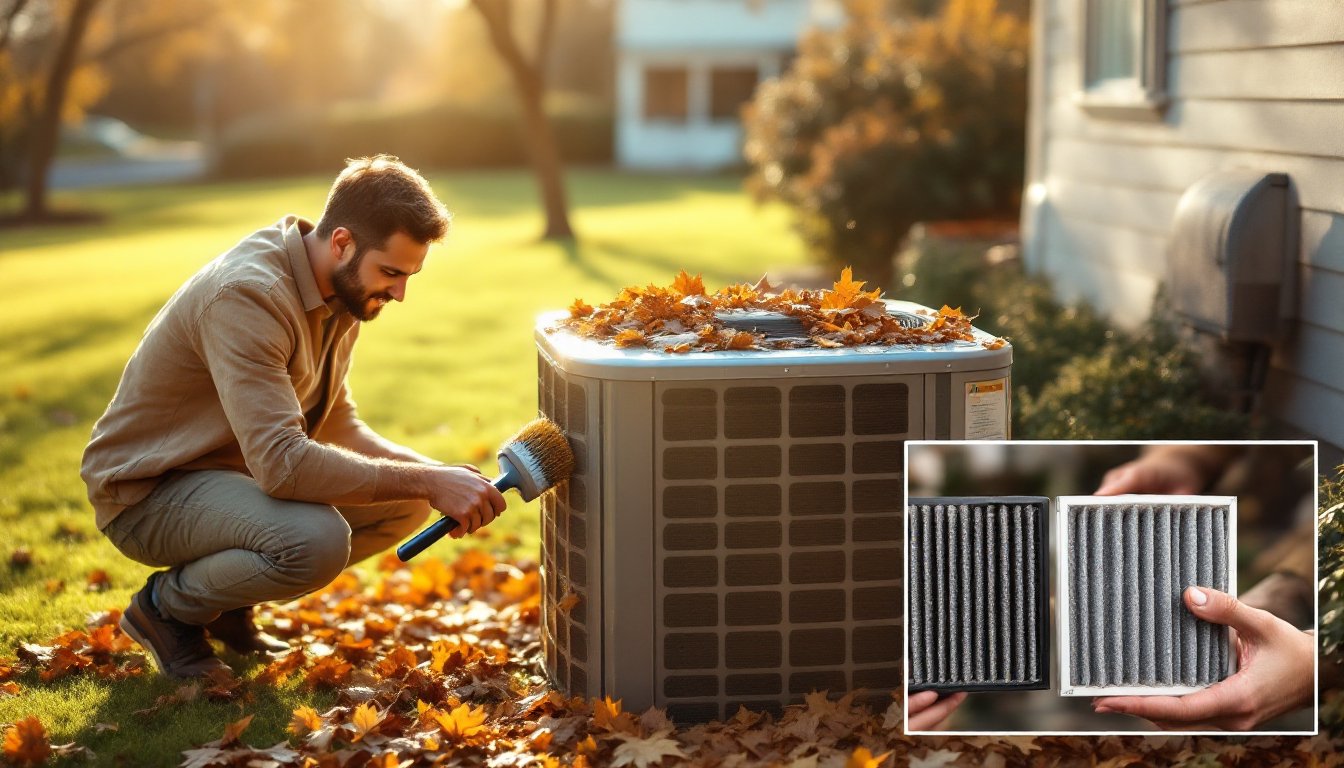
- Replace your air filter before cold season hits—dirty filters force furnaces to work harder, waste energy, and should be checked monthly during heating season.
- Clean outdoor condenser units of leaves and debris, trim surrounding vegetation within 2 feet, and avoid pressure washers to prevent fin and coil damage.
- Inspect accessible ductwork for leaks and sealed gaps with UL 181-approved duct tape or metallic mastic to prevent 15–25% energy loss from escaping conditioned air.
- Test your heating system in mild fall weather by running it, checking vents, and listening for unusual noises—catching problems early avoids costly emergency service calls.
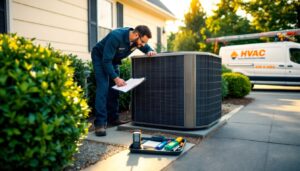
- Schedule professional HVAC maintenance in September or early October before peak season to identify refrigerant leaks, worn components, and heat exchanger issues that homeowners often miss.
Replace Your Air Filter Before the Cold Season
A dirty air filter is the fastest way to tank your heating efficiency and shorten your system’s lifespan. When dust, pet hair, and debris clog the filter, your furnace or heat pump works harder to pull air through, wasting energy and putting strain on components. Filters typically need replacement every 1 to 3 months, depending on your home’s air quality, pets, and whether anyone has allergies.
Before winter hits, check your filter and swap it out if it looks gray, brown, or feels thick with buildup. Most residential systems use 1-inch thick pleated filters (16×24, 20×25, 16×25, or 14×25 inches are common sizes, check your furnace’s slot for the exact dimensions). If you have pets or live in a dusty area, consider a higher MERV rating (Minimum Efficiency Reporting Value of 8 to 11 works well for homes without respiratory issues: higher ratings restrict airflow and demand a stronger furnace).
Replacing a filter takes two minutes. Shut off your furnace, slide out the old filter, and note the arrow printed on its frame, that arrow shows airflow direction and must point toward the furnace. Snap in the new filter the same way, turn the system back on, and you’re done. Mark your calendar to check again in one month. Homeowners who use HVAC preventative maintenance guides report cleaner air and lower heating costs as a direct result.
Clean and Clear Outdoor Condenser Units
Your air conditioner’s outdoor condenser (the big metal box outside) can become a debris trap over fall and early winter. Leaves, twigs, pollen, and dirt accumulate on the aluminum fins, blocking airflow and reducing your system’s ability to exchange heat efficiently. Even if you don’t run AC in winter, a clean condenser ensures your heat pump operates smoothly if you use one for heating.
Start by turning off power to the unit at the breaker. Use a soft brush or handheld vacuum to gently remove leaves and loose dirt from the fins, the thin, delicate aluminum blades. For stubborn grime, a garden hose on low pressure works: never use a pressure washer, which can bend fins and damage the coil. Once the unit is clean, trim any vegetation or branches within 2 feet of the unit to maintain airflow throughout winter.
If your system has a removable protective cover, leave it off during heating season so air can flow freely. Some people install a condenser cover (a fabric shield available at hardware stores), but ensure it has vents on the sides and top, a sealed cover traps moisture and causes rust. A simple protective cage made from PVC keeps leaves out without restricting airflow. Ten minutes of cleaning now prevents ice and snow from packing around the unit and damaging the cabinet.
Inspect and Seal Ductwork for Efficiency
Leaky ductwork is an invisible energy drain. If your ducts have gaps, holes, or loose connections, heated air escapes into attics, crawlspaces, or walls instead of reaching your living areas. Studies show that poorly sealed ducts can waste 15 to 25 percent of conditioned air, forcing your system to run longer and harder to maintain comfort.
Inspect accessible ducts in basements, attics, and crawlspaces. Look for visible gaps where sections connect, torn insulation, or flexible duct that’s crushed or kinked. Small holes (pencil-sized or smaller) and minor leaks can be sealed with metallic mastic sealant (a gummy paste applied with a brush or applicator tool) or duct tape labeled UL 181 (yes, proper duct tape exists, don’t use hardware store gray tape, which degrades). For rigid metal ducts, mastic is more durable: for flexible ducts, mastic or specialized duct wrap tape works well.
For major leaks, disconnected sections, or heavily damaged ducts, call a professional, sealing large sections requires removing and re-insulating ductwork, which is beyond most DIYers. If your ducts are heavily insulated or located in tight spaces, a professional energy audit using blower-door tests can identify leaks you can’t see. Sealing ductwork is one of the highest ROI efficiency upgrades available and pairs well with other maintenance tasks.
Test Your Heating System Thoroughly
You don’t want to discover a heating problem on the first freezing night of the season. A test run in mild fall weather gives you time to troubleshoot or call a technician without urgency.
Set your thermostat to heat mode (if it’s not already there from summer) and raise the setpoint a few degrees above the current room temperature. Listen for the furnace to kick on, then walk around your home and feel air coming from supply vents. All vents should feel warm within a minute or two: if some are cold while others are hot, you may have a balancing issue or a blocked duct. Return vents (where air gets pulled back toward the furnace) should also feel open and unobstructed.
Check your pilot light if you have a gas furnace. A steady blue flame is normal: a yellow or orange flame suggests a combustion problem and warrants a professional inspection. If your furnace won’t start, the igniter or gas valve may be failing. Electric furnaces should show power at the breaker and hum or activate within seconds of a call for heat. Heat pump systems should switch from cooling mode without delay: if the system hesitates or the backup resistance strips kick in too often, refrigerant levels or valve operation may be off.
Listen for unusual noises: grinding, squealing, or banging often signal loose components, worn blower bearings, or heat exchanger cracks. A pro can identify and fix these issues before they escalate. Testing now is free: waiting until January for an emergency call costs 2 to 3 times more.
Check Thermostat Settings and Performance
Your thermostat is the command center of your heating system. A poorly calibrated or outdated unit wastes energy and leaves you uncomfortable. Start by checking the thermostat’s location, it should be on an interior wall, away from direct sunlight, drafts, doors, and heat sources like lamps or registers. If it’s mounted near a window or on an exterior wall, it reads temperature incorrectly and may cause your system to cycle inefficiently.
For mechanical thermostats (dial or lever style), ensure the unit sits level. A tilted housing throws off the internal switch mechanism. Mark the thermostat’s current setting with a piece of tape, then rotate the dial or lever slowly and listen for a distinct click, this signals the heating element engaging. If the dial is smooth with no click, the switch contacts may be dirty and need professional cleaning.
Programmable and smart thermostats offer savings by lowering temperature when you’re away or asleep, then raising it before you return or wake up. A 7 to 10 degree setback for 8 hours daily can trim 10 to 15 percent off heating costs. Home service platforms like Angi offer guides on selecting thermostats for your system type and home size. Battery-powered thermostats display a low-battery warning: replace batteries now so the device doesn’t lose settings during winter. Test the thermostat by setting it 5 degrees above room temperature and confirming the furnace starts within 30 seconds: repeat in cooling mode if you have AC.
Schedule Professional Maintenance
Even if you’re handy, an annual professional HVAC tune-up is essential. Technicians have tools and training to detect problems homeowners miss and can service components that aren’t safe or accessible for DIY work. A standard maintenance visit includes cleaning the furnace blower, checking electrical connections, lubricating bearings, testing gas valve pressure, inspecting the heat exchanger, and verifying system operation across all temperature modes.
Fall is the busiest season for HVAC companies, so book service in September or early October rather than waiting until November. Many contractors offer lower rates for off-season appointments or annual service plans that cover both spring and fall visits. During a professional tune-up, the technician will catch issues like refrigerant leaks in heat pumps, corroded electrical contacts, worn fan belts, or cracked heat exchangers, problems that can be expensive if they cause a breakdown.
If your system is 10 to 15 years old, ask the technician about its efficiency rating and lifespan. Older systems may be near the end of their service life, and upgrading to a modern, high-efficiency model before an emergency failure saves money in the long run. Family Handyman offers detailed DIY maintenance guides for homeowners who want to understand what professionals are checking, but actual servicing like refrigerant handling and electrical diagnostics should stay in pro hands.
Conclusion
Fall HVAC maintenance is preventive work that pays for itself in comfort, efficiency, and avoided emergency calls. A clean filter, clear condenser, sealed ducts, and a system test take an afternoon and cost almost nothing. Add a professional tune-up, and you’re guaranteed to head into winter with confidence. Start this checklist now, waiting until December means scrambling for appointments and facing a cold home during the wait.