September rolls around, and suddenly the air turns crisp. Before you know it, that furnace sitting in your basement will be running 24/7 to keep your home warm. Fall furnace maintenance isn’t glamorous, there’s no finished deck or fresh paint to show for it, but it’s one of the smartest investments you can make. A well-maintained furnace runs more efficiently, keeps your energy bills in check, and avoids leaving you shivering when temperatures drop. Most homeowners can handle basic checks themselves, though some steps benefit from a professional touch. Let’s walk through what you need to do now, before winter kicks in and your HVAC system gets hammered.
Table of Contents
ToggleKey Takeaways
- Fall furnace maintenance prevents expensive repairs and emergency breakdowns by catching worn ignition switches, cracked heat exchangers, and other issues before winter heating season arrives.
- Replacing your furnace filter every 30–90 days with the correct MERV rating (8–11 for most residential systems) ensures optimal airflow and efficiency while protecting the heat exchanger.
- A professional HVAC inspection in early September costs $100–$200 but identifies safety concerns and component failures that homeowners cannot detect, saving thousands in potential winter emergency repairs.
- Clearing vents, blocking ducts, and scheduling professional duct cleaning (if needed) restores proper airflow and prevents your furnace from overworking.
- Weatherstripping doors, insulating pipes, and positioning your thermostat correctly can reduce heating costs by 10–15% while keeping your home comfortable throughout winter.
Why Fall Furnace Maintenance Matters
Your furnace is hardworking equipment. Over spring and summer, dust, pet dander, and debris accumulate in ducts and on filters. When heating season arrives, your system fires up and pushes all that through your home unless you’ve cleaned things out.
A neglected furnace costs more to run. Clogged filters force the blower to work harder, spiking energy consumption and wearing down components faster. You might not notice until mid-January when a bearing fails and you’re facing a $1,500 repair, or worse, a complete replacement that runs $5,000 to $10,000+.
Regular fall maintenance catches small problems before they become expensive ones. Worn ignition switches, cracked heat exchangers, and restricted airflow all get worse over the heating season. Catching them early means a $200 service call instead of an emergency breakdown on the coldest night of the year. Think of it as insurance: a few hours of work now prevents serious headaches later.
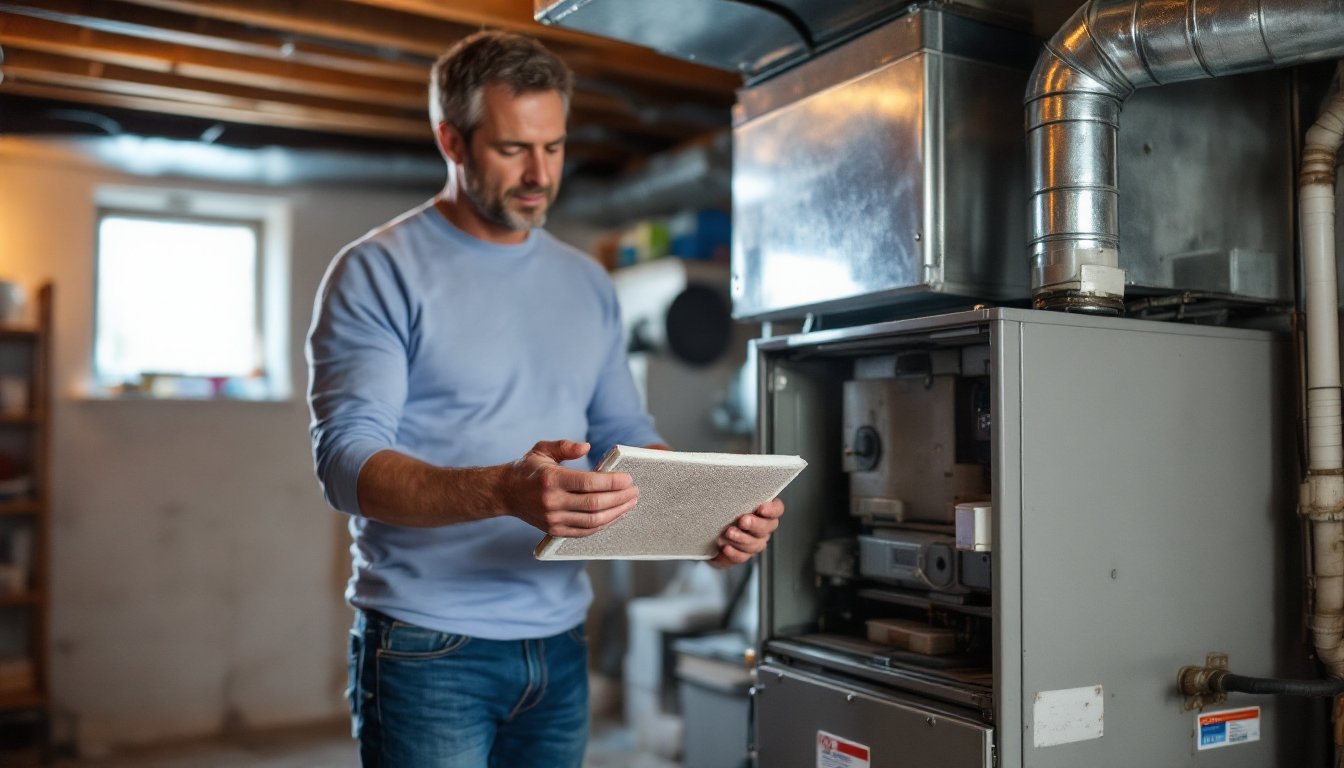
Inspect and Replace Your Furnace Filter
Start with the filter, it’s the easiest task and makes the biggest difference. Your furnace filter traps dust and particles, protecting the heat exchanger and blower. A clogged filter restricts airflow, causing the system to overheat and cycle on and off more frequently.
Locate your filter. Most systems use a 1-inch, 16×25-inch, or 20×25-inch filter (nominal sizes: actual dimensions run slightly smaller). Your furnace has a slot on the intake side, typically in a closet, basement, or utility closet. Pull out the old filter and look at it: if it’s noticeably gray or brown with dust buildup, it’s overdue for replacement.
Buy a replacement filter with the same dimensions. MERV ratings (Minimum Efficiency Reporting Value) range from 1 to 16: most residential furnaces work best with MERV 8 to MERV 11. Higher-MERV filters trap smaller particles but can restrict airflow if your blower isn’t sized for them, check your furnace manual or ask your HVAC tech if you’re unsure.
Slide the new filter in, noting the arrow printed on the frame: it points in the direction of airflow (toward the furnace). Many homeowners install it backward, defeating the purpose. Mark your calendar to check again in 30 to 90 days, depending on pets, dust, and humidity in your home. If you have kids and pets, plan on replacing it every month during heating season.
Clean Vents and Ducts for Optimal Airflow
Blocked vents throttle your heating. Walk through each room and make sure return-air vents (the larger openings that suck air back to the furnace) and supply vents (where warm air comes out) are unobstructed. Move furniture, curtains, and storage boxes away from vents. This sounds trivial, but many homeowners accidentally block vents and then wonder why one room never warms up.
For visible ductwork, grab a damp cloth and wipe down vent covers and the first foot or so of ductwork. Dust settles on these surfaces and reduces efficiency. Use a vacuum with a brush attachment to clean around vent grilles.
If you suspect significant duct contamination, visible mold, rodent droppings, or heavy dust inside the ducts, call a professional duct-cleaning service. A technician uses specialized equipment to brush and vacuum ducts from the inside, which a homeowner can’t safely replicate. This typically costs $300 to $800 depending on system size and contamination level. It’s not always necessary every year, but if it’s been 5+ years since your ducts were cleaned and you’ve had pets or renovation work, it’s worth the investment. Most HVAC preventative maintenance guides recommend checking ducts annually and cleaning as needed.
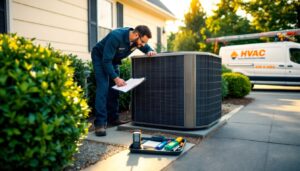
Schedule a Professional Furnace Inspection
This is the step you shouldn’t skip, even though it costs money. A licensed HVAC technician inspects components you can’t easily see: the heat exchanger, ignition switch, gas valve, and blower motor. They test the system under load and measure combustion gases to ensure safe operation.
Schedule your inspection in early September or late August, before the rush hits. Many HVAC companies get slammed once temperatures drop and folks panic. An inspection typically costs $100 to $200 and takes 45 minutes to an hour.
During the visit, the tech will clean or replace the burner assembly, lubricate blower bearings if needed, check the pilot light (on older models), test gas pressure, and inspect the flue. They’ll also verify your thermostat is communicating correctly with the furnace. If they find issues, a cracked heat exchanger, a failing capacitor, a gas leak, you’ll know now and can plan a repair before winter hits.
If your furnace is 15+ years old and repair costs exceed 50% of the replacement cost, ask your tech for an honest opinion on longevity. A 20-year-old furnace might get through one more season, or it might fail next week. Having that conversation in fall beats discovering it’s time to replace in January when emergency pricing applies.
Test Your Thermostat and Safety Features
Set your thermostat to heat mode and lower the temperature by 10 degrees below the current room temperature. The furnace should kick on within a minute. If it doesn’t, there’s a communication or ignition issue, call your HVAC tech.
If you have a programmable or smart thermostat, now’s the time to set up your heating schedule. Most homeowners program temps to drop 5–10 degrees overnight and when nobody’s home, then rise an hour before wake-up or return. This saves 10–15% on heating bills and prevents that shock of a frigid house.
Check safety features: most furnaces have a limit switch that shuts down the burner if the system overheats (usually around 200°F). If dust or airflow restrictions trigger this repeatedly, the furnace will cycle on and off annoyingly, another sign your filter needs attention or ducts need cleaning.
For gas furnaces, test the gas valve shutoff if you have a manual control near the unit. You should be able to turn it on and off smoothly. If it’s stuck or hard to move, have a tech service it. Finally, locate your furnace’s power switch (usually a standard light switch nearby). Make sure it’s accessible in case of emergency.
Prepare Your Home for Winter Heating
Beyond the furnace itself, a few quick prep steps keep your heating costs down and your home comfortable.
Weatherstrip doors and windows. Gaps around frames let cold air seep in, forcing your furnace to work harder. Weatherstripping tape is cheap, $1 to $3 per pack, and takes minutes to install. If you have drafty basement doors or old exterior doors, consider door sweeps (a rubber seal attached to the door’s bottom) or temporary draft stoppers filled with sand or foam.
Insulate exposed pipes in your basement or crawl space. Frozen pipes aren’t just a nuisance: they burst and flood, leading to thousands in damage. Foam pipe insulation sleeves cost $5 to $15 and prevent freeze-ups in unheated areas.
Check that your thermostat isn’t in direct sunlight or near a vent or heat source. Thermostats sense temperature and adjust the furnace based on that reading, if they’re misplaced, they’ll cause the system to run longer than needed. A thermostat in afternoon sun might read 72°F when the rest of the house is 68°F, keeping the furnace off when it should run.
Ventilate your attic and crawl space. Proper ventilation prevents moisture buildup and ice dams in winter. If soffit or gable vents are blocked by insulation or debris, clear them out. According to home improvement best practices, proper attic ventilation also extends roof life and prevents costly structural issues down the line.
Conclusion
Fall furnace maintenance is preventive medicine for your home. A clean filter, open vents, professional inspection, and working thermostat keep your system running efficiently and reliably through the coldest months. Most of these tasks take a weekend afternoon, well worth the peace of mind. Start now, before the season shifts, and you’ll stay warm and comfortable without surprises.