Spring is the ideal time to ensure your HVAC system is ready for warmer months, and to catch any issues before the cooling season hits hard. Whether you’re gearing up for air conditioning or wrapping up heating season, a routine HVAC maintenance check can prevent expensive breakdowns, improve energy efficiency, and extend your system’s lifespan. This guide walks you through what homeowners can inspect themselves, when to call a pro, and why regular HVAC maintenance matters for your comfort and wallet.
Table of Contents
ToggleKey Takeaways
- Spring is the ideal time for an HVAC maintenance check to improve efficiency by 15–20%, lower utility bills, and catch issues before cooling season arrives.
- Replace air filters every 30–90 days and clear outdoor condensers of debris to maintain proper airflow and system performance.
- Test your HVAC system by checking temperature differentials (30–50°F warmer in heating mode, 15–20°F cooler in cooling mode) to identify potential refrigerant or heat exchanger problems.
- Safely clear condensate drain lines with a vinegar-and-water solution and clean outdoor coils with a garden hose to prevent costly breakdowns.
- Schedule annual professional HVAC maintenance for refrigerant checks, electrical inspections, and heat exchanger diagnosis—tasks that require licensed technicians and cannot be DIY.
- Know your limits: homeowners can handle filter changes and visual inspections, but refrigerant handling, capacitor replacement, and electrical repairs must be left to certified professionals.
Why Regular HVAC Maintenance Matters for Your Home
Skipping HVAC maintenance is like ignoring your car’s oil changes, it catches up with you. A well-maintained system runs 15–20% more efficiently than a neglected one, which translates directly to lower utility bills. More importantly, routine checks catch refrigerant leaks, electrical issues, and mechanical wear before they become costly repairs or emergency failures.
Building codes and manufacturer warranties often require annual professional servicing. If your system is still under warranty, skipping maintenance can void coverage. Beyond economics, a properly functioning HVAC system maintains consistent indoor air quality and humidity levels, which is especially important for households with allergies or respiratory sensitivities. Regular maintenance also reduces strain on the compressor and other components, meaning fewer emergency calls in July or January when technicians are overbooked and pricing spikes.
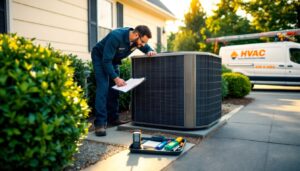
Essential Pre-Season HVAC Inspection Checklist
Visual Inspection and Filter Assessment
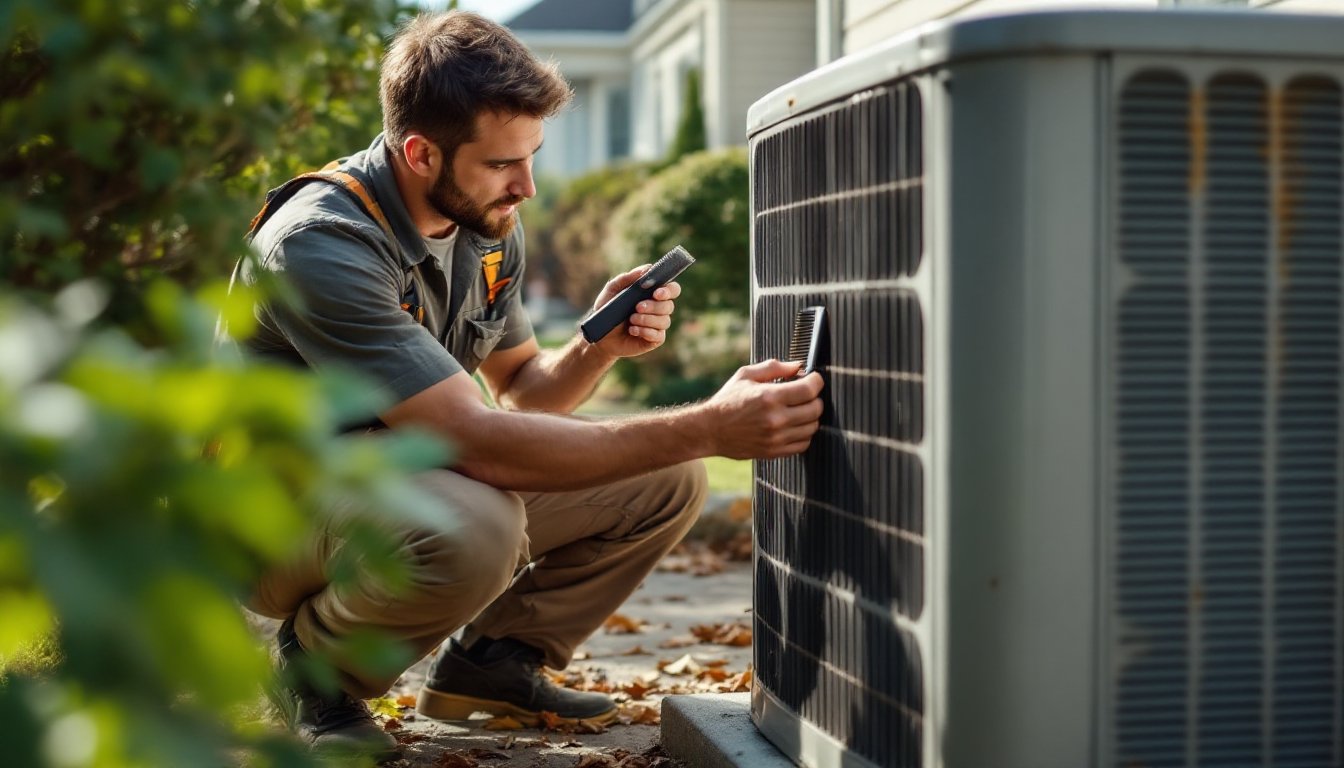
Start with the visible hardware. Examine the outdoor condenser unit (the large metal box outside) for bent fins, debris, leaves, or standing water around the base. Gently straighten bent fins with a fin comb if there are only a few, but extensive damage warrants a professional inspection. Clear away any sticks, leaves, or vegetation within 2 feet of the unit.
Inside, locate your system’s air filter, typically a 1-inch, 4-inch, or 5-inch thick pleated or fiberglass filter in a wall return, furnace cabinet, or air handler closet. A clean filter looks white or light gray: a clogged one is brown or black. Check the arrow printed on the frame and confirm it points toward the unit. If the filter is visibly dirty after 1–2 months of use, upgrade to a higher MERV-13 filter (hospital-grade) rather than a basic MERV-8, but be aware that high-MERV filters require more airflow, check your system’s specifications to avoid strain. Replace filters every 30–90 days depending on pets, dust, and seasonal use.
Next, inspect ductwork visible in basements, attics, or crawl spaces. Look for loose connections, holes, or torn insulation. Duct tape (even though its name) is temporary and fails within months: use metal foil tape or mastic sealant for leaks. Sealing ductwork can recover 15–20% of conditioned air that would otherwise escape.
Testing Your System for Proper Operation
Set your thermostat to heating mode (if it’s still winter in your area) or cooling mode (for spring/summer). Switch it from “Auto” to “On” so the fan runs continuously, or use “Cool” to trigger active cooling. Listen for the outdoor unit to start within 30 seconds, it should hum steadily without grinding, squealing, or rattling. If you hear unusual noises, stop and call a technician: internal compressor damage is irreversible and expensive.
Feel the supply air vents around your home. Conditioned air should flow steadily from registers. If certain rooms feel weak, blockages in ducts or closed dampers are likely culprits. Check return air grilles too, dust buildup starves the system of return air and causes pressure imbalances. Once the system runs for 5–10 minutes, use a digital thermometer (or your phone’s thermometer app if equipped) to check the temperature differential. In heating mode, supply air should be 30–50°F warmer than return air: in cooling, 15–20°F cooler. Significant deviations suggest refrigerant issues or heat exchanger problems that a professional must diagnose. Verify your thermostat is level, secure, and not directly in sunlight, all of which affect temperature readings.
DIY Maintenance Tasks You Can Handle Yourself
You don’t need a license to perform basic upkeep. Beyond filter changes, here are safe, high-impact tasks.
Cleaning the outdoor unit: Turn off power at the breaker before touching anything. Use a soft brush or fin comb to gently clean between the condenser coils, the aluminum fins on the sides and back. Avoid a pressure washer, which can damage the delicate fins: a garden hose on low spray is fine. Let the coils air-dry before restoring power.
Clearing the condensate drain: The small pipe near your indoor air handler drains moisture. If clogged with algae or mold, water backs up and triggers safety switches that shut down your system. Use a wet/dry vacuum or turkey baster with a mix of equal parts white vinegar and water to flush the drain line. This takes 10 minutes and prevents many no-cool situations.
Checking electrical connections: If your air handler is accessible, look for loose wires (the system should be off). Vibration from the blower can loosen terminals: gentle reseating often solves intermittent operation.
Inspecting the furnace or air handler cabinet: Ensure the access panel closes securely and that there’s 12 inches of clearance around the unit for airflow. Blocked air handlers overheat and shut down.
These tasks require basic tools, a brush, flashlight, fin comb, and possibly a vacuum. No special certifications needed. Safety first: always turn off power before touching internal components, and wear gloves and a mask when handling dusty filters or drain lines.
When to Call a Professional HVAC Technician
Certain maintenance jobs are either illegal without a license or require specialized equipment. Refrigerant handling is illegal for unlicensed technicians: EPA regulations prohibit venting refrigerant, and undercharging or overcharging the system wastes energy and damages the compressor. If you suspect a leak (hissing sounds, reduced cooling, oily spots around connections), call a pro immediately.
Electrical repairs, especially any rewiring of the control board or replacing the blower motor, should be handled by certified technicians. Mistakes cause fires or electrocution. Similarly, if your capacitor (the cylindrical component that starts the compressor) has failed, a technician must replace it, it can store deadly charges even when the unit is off.
Schedule a professional visit annually, ideally before your peak season. A technician will measure airflow, test controls, inspect the heat exchanger for cracks, check refrigerant charge, lubricate motors, and document performance. Many service providers offer maintenance plans with discounts and priority scheduling. Platforms like Angi let you compare local HVAC contractors and read reviews before booking. If your system is over 15 years old and repairs are approaching 50% of replacement cost, a technician can help you weigh repair vs. replacement, new systems are far more efficient and often qualify for federal tax credits.
Building permits are required if you’re replacing a unit, extending ductwork, or adding a new return-air vent. Your technician should handle permitting, but verify upfront. Don’t hire based on price alone: get at least three quotes, confirm licensing and insurance, and ask for references. The cheapest bid often reflects corners cut or warranty gaps.
Conclusion
Spring HVAC maintenance doesn’t demand expertise, clean filters, cleared condensate drains, and a visual inspection catch most issues early. Know your limits: DIY filter swaps and coil cleaning are fair game, but refrigerant, electrical work, and deep diagnostics belong with a licensed technician. A small annual investment in maintenance pays dividends in reliability, efficiency, and peace of mind through summer and winter.